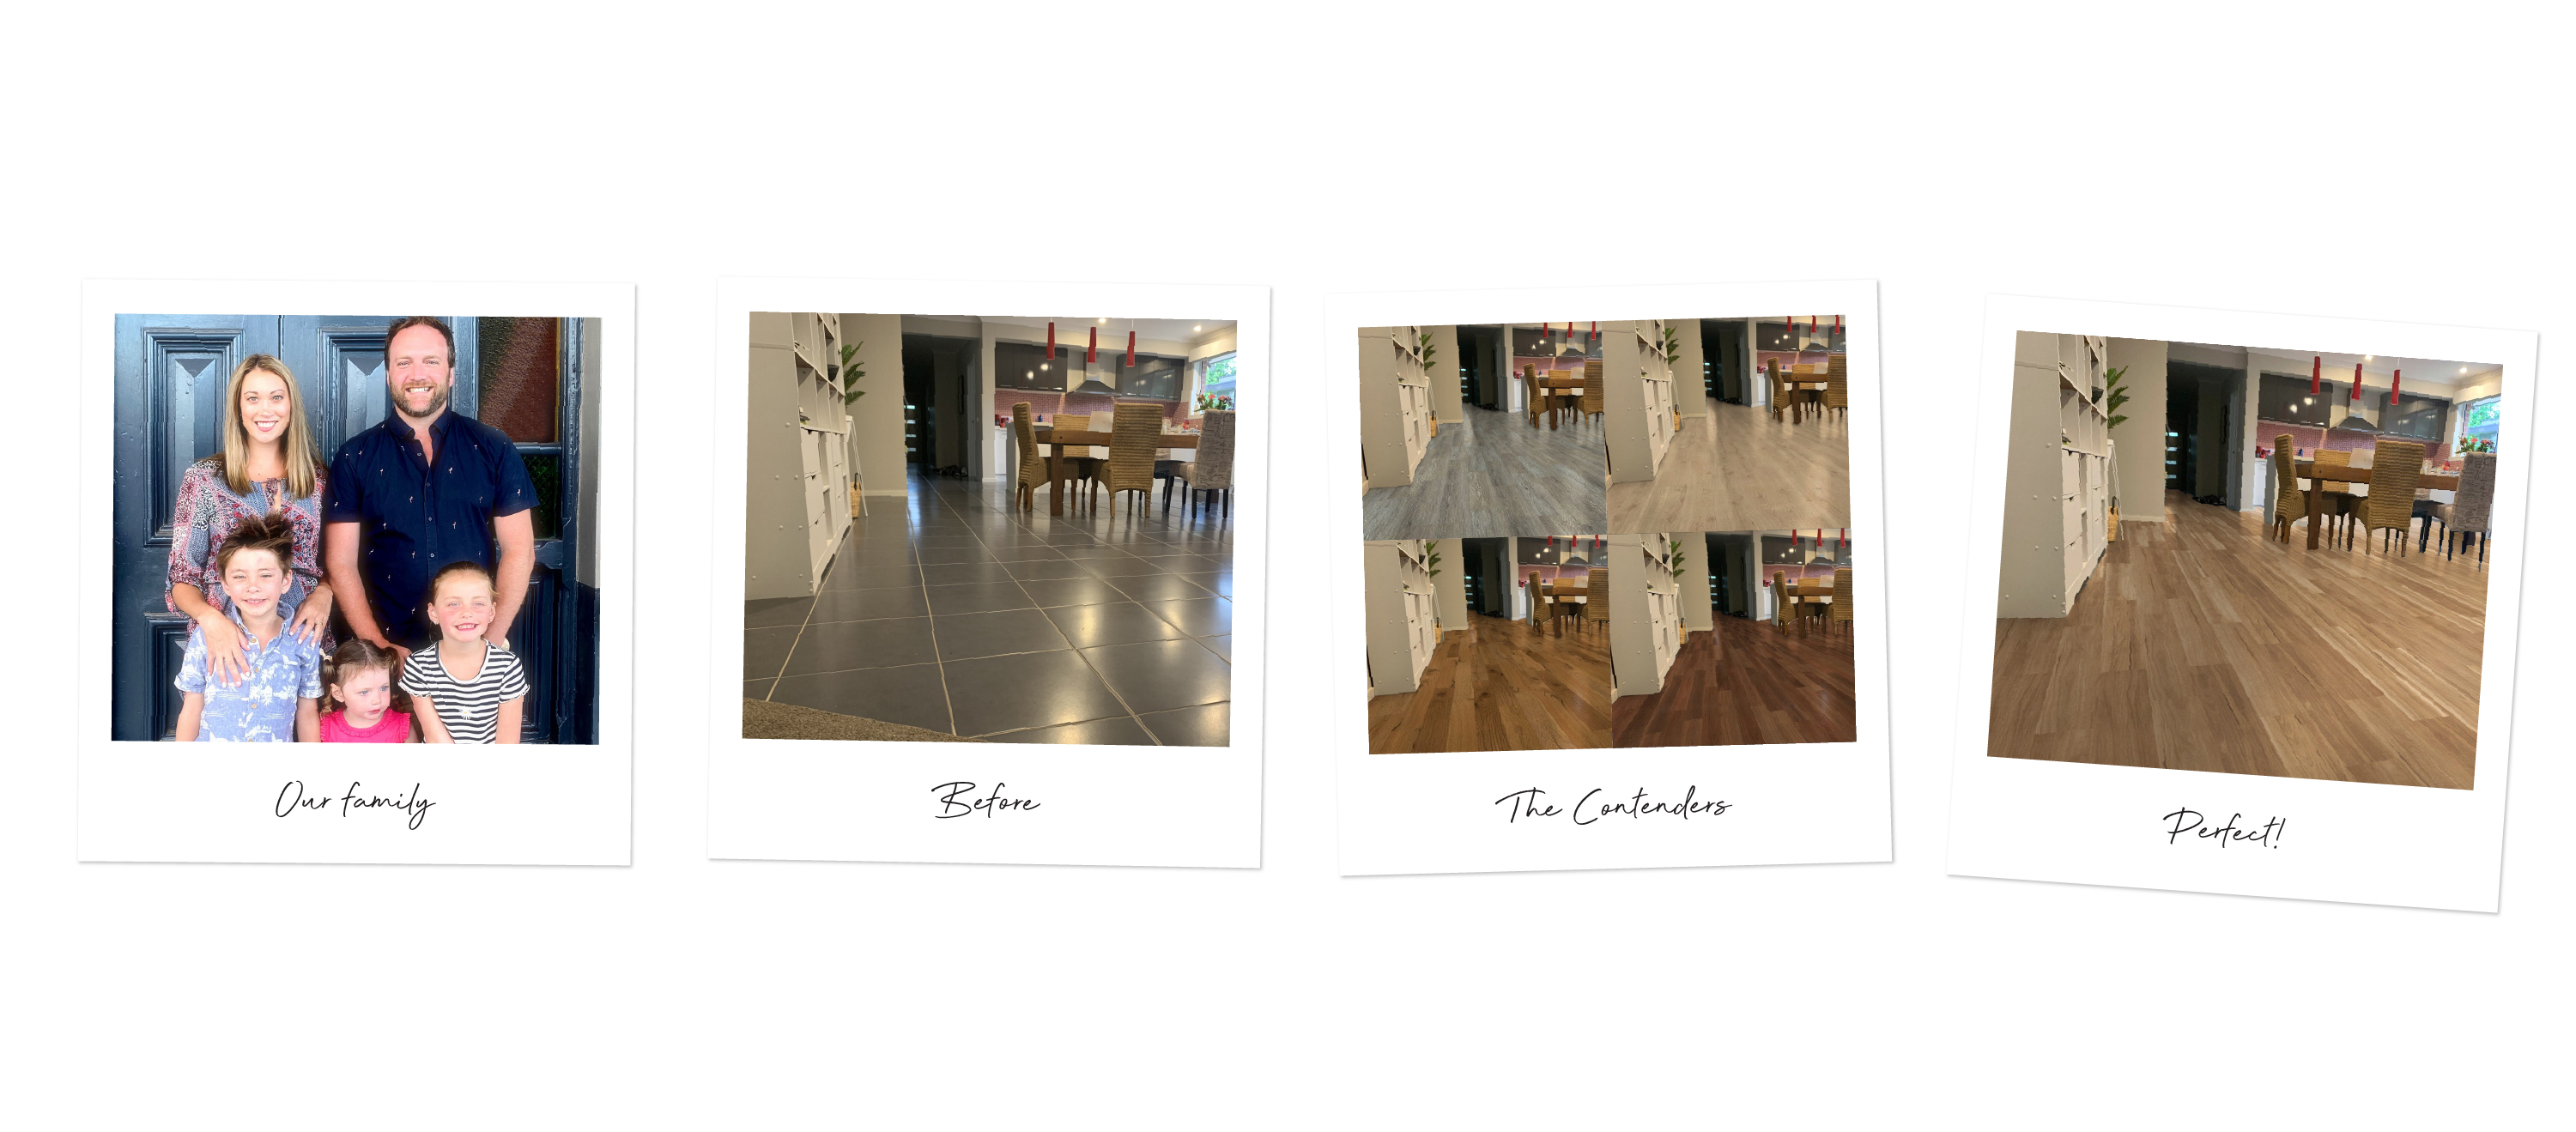
Our Conundrum
When we moved into our home four years ago, we loved everything about it - except for the dark grey tiles. They were cold in Melbourne winters, hard on my lower back and extremely difficult to keep clean, which as a full time working mum with 3 kids under 10, made it even more difficult.
Dark tiles seem to show up everything and anything - from sand to crumbs, to spilt drinks - our tiles were not very forgiving!
After settling into the house and putting up with the dark colour and the impracticality of the tiles, we finally decided to make the move and change up the flooring to something more practical and lighter.
We did some research online, and after many enquiries as to what was the best option, we decided on a Luxury Vinyl plank as it had all the positive attributes we were missing from the tiles.
They could be installed over tiles, which was our main requirement as we did not want the mess (and cost) of having to take up all the tiles and dispose of them. Luxury Vinyl planks are warmer and softer underfoot, and in terms of maintenance and ease of cleaning, they looked to be a far better option.
Then came the next decision.
Which one? With so many ranges to choose from we wanted to make sure we made the right choice..jpg")
First Steps
Being time poor, I jumped on the Choices Flooring RoomView tool where I could upload the areas I wanted flooring in, and in an instant I could see that what I thought I wanted in colour – a light grey - did not suit the rest of the colouring of the house. What a lifesaver this program was to make sure we picked the perfect floor!
It was a fun experience, and you can spend hours comparing different colours into your own home until you find the perfect match. We decided on the Karndean Looselay Longboard in Lemon Spotted Gum. A bright colour with interesting grains, we felt the colour and style suited our current interiors, including the recycled 10 seater timber dining table and our wicker chairs.
The Winner
This is the result we got from RoomView!
It was the exact look we wanted.
Now was the time to put the wheels in motion.
Commitment time
We booked a Free Measure & Quote through our local Choices Flooring store and they came out to measure up the space and provide samples of the floor we had chosen. After seeing the samples in the home, at various light stages of the day, we knew this colour was the one for us.
After receiving the quote, we booked in an installation date and then the countdown was on.
A few days prior to the installation, the planks were dropped off at our home to ‘acclimatise’ (to ensure the product has time to adjust to the temperature in our home).
Preparation
Prior to installation we had to move all our furniture, fridge and dishwasher out of the area on which the flooring was being installed (we did have an option for Choices Flooring to do this however we chose to get friends and family to help). It minimises the cost and it is a good chance to declutter!
Then it was time for a mini-break.
In order for the installation to be perfect, the installer had to prepare the tile area so it was smooth (i.e. all our tile edges needed to be smoothed to allow for the layer of self-leveling Latex to cover the entire area without any ridges showing)
This required preparation and drying time, which meant an overnight stay at a family member's place was in order.
So, while we relaxed, our home was slowly being prepared for installation the following day.
The day finally arrived. With the latex compound having dried overnight, the floor could now have the Luxury Planks installed over the top.
The Big Reveal!
We were so excited to see the result on the second day, and as soon as we stepped into our home we were absolutely thrilled! We were so happy with how the planks had bought new light to our family area and even more excited that the planks are so much more forgiving of daily spills! Plus, the planks are more noise absorbing, and so much more comfortable to walk on, of which my feet and back are thankful for!
To be honest we did not realise what skill and workmanship it takes to get the right colour variations and tones running perfectly through the space. Our installers absolutely nailed the pattern matching with the various coloured planks, and made it look so true to life – just like the real timber product.
We are still loving our new floors and could not recommend enough how much better our home feels with more light and comfort underfoot.
Without using the RoomView program I do not know if the process would have been as easy as it was.
And it also pays to have a local Choices Flooring store who knows their stuff – including the wonderful installers that created the flooring masterpiece that we love so much!
Now to start on the kitchen renovation!

Recent Posts

Benefits of Hard flooring Underlay
The underlay you choose can make a significant imp...

Benefits of Carpet Underlay
Investing in high-quality carpet underlay can impr...

The Ultimate Guide To Choosing The Right Flooring Underlay For Your Home
In the world of home decor, where plush carpets an...

From Comfort to Style: How the Perfect Floor Can Transform Your Room
Floors are not just surfaces - they are design sta...

Timeless Timber Flooring Trends
Winter is a season of cozy nights, warm beverages ...

Hard Flooring | Hardwood Floors | Choices Flooring
Looking for hardwood flooring? We stock a large ra...